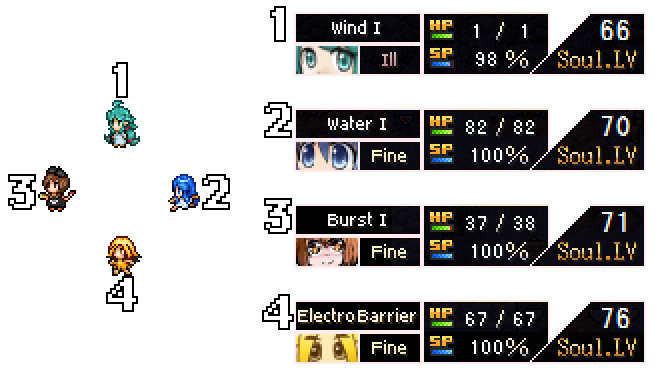
A: The standard diamond looks like this from 1st to last in the party screen:
Q: What kind of game is ENCHANT FARM?
A: ENCHANT FARM is an exploration-focused JRPG that offers a high degree of freedom for how you may approach party composition, choosing where to go, what to do, and when to do it (if at all). Very few things, if any, are mandatory in order to beat the game. Some have described it as a 2D rendition of King’s Field or Dark Souls.
Q: So is the game actually good, or what?
A: Good enough to have nonstop, recurring discussion threads on certain Japanese message boards from 2015~2020. Due to the intricacies of and level of player expression possible in the battle system, as well as the wide-open sandbox nature of the game, many players drop ENCHANT FARM early on before truly understanding how it works. Those who persevere, however, find it to be deep and rewarding with myriad ways to route the game and countless viable builds and party compositions to conquer the many challenging battles.
Q: Is the game pretty hard then?
A: It can be. New players can expect to die upwards of 50 times during their first blind playthrough while getting a sense of how to survive ENCHANT FARM’s many trials. Even with a full party of 4 and consulting a guide, do not expect to have an easy time, or for battles to be the quick and dirty affairs of less challenging RPGs. That said, beating the main game is not that difficult once you get your bearings. The secret bosses and post-game bonus bosses, however, are a different story.
Q: Will I ever get stuck and be forced to start the whole game over from scratch?
A: During a normal playthrough, not likely. ENCHANT FARM is designed carefully so that you are extremely unlikely to put yourself in an unwinnable situation. This cannot be said of Hardcore mode which has finite encounters and other things that can cause you to become truly stuck. The game is also perfectly beatable without consulting a guide.
Q: How many endings are there?
A: 3. Highlight the spoilered text to view the conditions for each ending.
Q: What are the carryover passwords on the start screen, and what do I get from them?
A: The Darkness I’s Black Market Dungeon password is KIRIN and nets you a Fortune accessory which can be obtained at a house in Verdant Valley.
The LIGHT TOWER password is HELL and causes 2 chests to appear in a house in Verdant Valley which contain Magicite Sources of varying types depending on your main character. One of those chests will require a key to open.
Q: What’s the Wind I Creator carryover save thing supposed to mean?
A: Players who have beaten Kiito’s previous game, Wind I Creator, may drop their clear data into the game folder and load that save to obtain a recovery item set when starting out. The items are Stimulant (5), Lifedust (3), Soul Returner (3), and Soul Pot 11600 (1).
Subsequent playthroughs will require that you enter a password since there is no way to load the save again during a new game +. The answer to the question it asks is 5
Q: Can I change my main character after starting the game?
A: Yes. An NPC at a house in Snowy Vale offers a 1-time main character swap. You may switch to any of the 8 starting heroines as long as they have already joined your party. After the switch, this NPC will disappear. They will also disappear once you unlock the door that leads to The Royal Road (in the YAMI Dominion).
Q: My character has a skill that lists a damage reduction percentage and some other effect, but the effect doesn’t seem to work. What gives?
A: Each character in the game has a Guard Skill which is usually (but not always) named [(Word) Guard] (For example, Darkness I’s Provoke Guard). Most guard skills are only active when that character is guarding, so make sure to select Guard in battle when you want that skill’s effects to apply.
Q: My character has a skill that says something about how the enemy’s Hit% has no limit to how low it can go. What does that mean?*
A: Both Wind I and Quick Move have skills that can cause enemy attacks to be less accurate than is normally allowed by the game. Overall accuracy (HIT%) for any given attack is calculated based on a number of factors, including the difference between the attacker’s effective AGI and the defender’s effective AGI. Normally this is capped to a floor of (attack’s innate HIT% + any modifiers from items) / 2. However, Wind I’s Survival Instinct Passive Skill and Quick Move’s Emergency Dodge Guard Skill ignore that and can be reduced as far as the game will allow, approaching 0%, potentially making them near impossible to hit.
* The most recent revision patches clarify these skill descriptions to include this information explicitly, so it is worth updating to the latest patch if you have not already done so.
Q: My character has a skill that mentions a boost to the “innate type modifier” or “innate type rate.” What is that?
A: Boosts to the innate type modifier are effectively a STAB (Same Type Attack Bonus) boost which benefits characters who use skills and weapons of the same type as their first type. Refer to the glossary of terms below for further clarification on STAB.
Q: I can’t do any damage OR survive the damage foes are dishing out!
A: Skip ahead to the Information for Beginners section further down in this document for important knowledge that may just help with this problem.
Q: All of my attacks keep missing!
A: In the early game, or when using freshly-recruited characters, your attacks are very likely to miss quite often due to how much higher foes’ AGI are than your own party members, and how big of an impact AGI has on accuracy. This is not a matter of the game’s balance being off – this is simply an AGI issue. Pump some AGI levels into your party members and you’ll start to see a difference right away.
Q: I want to use the healing fountains, but I don’t want to lose my Soul Multiplier!
A: Fill bottles with water and drink them instead, as this will not reset the multiplier. As long as your party members are alive, they can drink bottled water without issue. In any event, unless you’re playing on Hardcore which has finite encounters, Souls should never be an issue anyway. Plus, fountains reset skill CT and uses (for the ones with limited uses that don’t reset between battles), which bottled water does not, so don’t feel like you’re missing out too badly by using the fountains.
Q: I need more Crystal Bottles!
A: In the early game, your best bet is to get the ones from saving Gomez at the Wrecked Ship, as well as the one dropped by a red encounter in the Central Highway. You can also make more at the Crystal Atelier in Verdant Valley if you have Crystal Shards and Gems to spare.
Q: I’m worried about wasting Magicite!
A: Magicite Shards and Gems can be purchased from a shop at the Dwarven Forge (Gems will require you to find a certain NPC in a mid-to-late-game zone, however). One thing you also might try is crafting various items and reloading your save to get an idea of what synthesizes into what, so you know what to expect and what to look forward to.
Q: What’s the difference between Crystal Shards and Crystal Gems?
A: Crystal Shards are worth 1 at Felix’s Crystal Atelier, while Gems are worth 4.
Q: I’m afraid of wasting Crystal Keys, Shining Crystal Keys, and Glistening Crystal Keys!
A: You can always craft more at the Crystal Atelier in Verdant Valley, provided you have the crystals to burn. Unless you’re routing the game specifically to access certain areas earlier than normal (e.g. early Skill Exchanger, early Burst I, etc), you need not worry about spending keys on doors and should instead try to find the master keys that unlock all of a certain door’s type.
Q: I don’t know where I’m supposed to go.
A: Start by going to areas with low ELv (Enemy Level) and work your way up. Almost all territories have some enemies that are a noticeably higher level than the rest in the area, so ignore those ones if you can’t beat them yet.
Q: The map is too big!
A: It may seem big, but it’s not as complex as its branching paths would lead you to believe. You are generally better off exploring each zone from corner to corner than trying to force your way forward, as the items, Souls, and other discoveries you make will set you up for success down the line.
Q: What’s the deal with the black wall looking tiles on the void areas of the map?
A: Typically, this is meant to signify other rooms or areas adjacent to the current map. The manner in which rooms and zones are connected is extremely important in this game and helps give you an idea of how it’s all laid out (and was probably helpful for the creator, as well). That said, not all rooms and areas have the gray tiles, so you’ll still need to search diligently to find those secret rooms.
Q: I screwed up while leveling up my characters! I want a do-over!
A: Unless you are playing on Tactical Mode (an extra difficulty modifier available in the Bonus Room after you have beaten the game at least once) there is no way to reset your levels. Unless you are playing on Hardcore, there are plenty of Souls to go around and you can level up all of the characters to SL250 if you really want to, so don’t worry about it.
Q: I learned EX Skills I don’t want! How do I get rid of them?
A: An NPC who can swap your EX Skills becomes available around the mid-game. Rather than fret about worthless EX Skills or try to save scum them, it is best to keep moving ahead so you can unlock that NPC more quickly.
Q: My characters aren’t learning EX Skills quickly, or at all.
A: Finishing battles while equipped with a Longsword that bears the Discipline skill greatly boosts the rate at which new EX Skills are learned. The Growth EX Skill also provides a nice boost to the learn rate.
Q: Do the Longsword skills Training and Discipline require me to deliver the finishing blows to enemies in order for them to work? What about the Pickaxe mining skills? Do these weapons have to be my Main Weapon, or can I still use them in the Sub-Weapon slot?
A: Merely finishing the battle with those weapons equipped and their skills considered “active” (visible on the character’s skill sheet in battle) is sufficient to trigger them. As long as the weapon is equipped, it does not matter whether it’s in the MW or SW slot. The Pickaxe skills do tend to fall off very rapidly if fighting foes who are a much lower level than your party, so it’s not uncommon for people to assume they aren’t working while trying to farm Magicite.
Q: I can’t get the party in the formation I want.
A: The standard diamond looks like this from 1st to last in the party screen:
Q: What’s the deal with going overweight on equipment?
A: Characters who are geared overweight lose SP equal to the overage each turn, and have reduced AGI. Using too heavy of equipment is not always a bad thing, and can even be used to your advantage in specific situations.
Q: Wind I disappeared! I wanted to add her to my party…
A: You can still get Wind I to join even if you missed her in the early game. She will join you towards the very end of the game instead.
Q: Stone I is nowhere to be found in the Western Graveyard.
A: She pokes her head out of the ground from time to time, so look carefully. If you still can’t find her, then she’s most likely moved to the Dwarven Forge.
Q: Quick Move is nowhere to be found at the Fallen Lighthouses…
A: She’s there, but her sprite does blend in remarkably well with the rest of the scenery.
Q: I’ve got a Lightning weapon/skill equipped, so why won’t Quick Move join me?
A: Be sure that your main character is the one equipped with the weapon or skill, then try talking to Quick Move again.
Q: How do I get Blood Water to join me?
A: Switch Water I into your active party before approaching her and select the proper dialogue choice.
Q: I don’t want Blood Water anymore…
A: The hooded man you meet in the YAMI Palace jail gives you exactly one (1) opportunity to revert Water I back to her normal form after you find him again at the Majin Temple. If you decline his offer the first time you speak with him there, then you are locked out of reverting Water I back during that playthrough.
Q: Burst I’s Color Bomb skill doesn’t display the Effect % for its types, and instead shows the % as if it were a Neutral type attack.
A: Correct. You must calculate this manually based on her types and the enemy’s types. The game will not do it for you. Burst I’s playstyle is geared towards advanced players who are expected to know type matchups and other efficacy modifiers off hand.
Q: Ingrid asked me to take down a crazy artist. I did. Burst I’s on the team now. Why isn’t she giving me my reward?
A: Burst I is not the Psycho Artist you’re after. Return to the Grand Prison and explore the east side thoroughly.
Q: I beat Captain Gomez on the Wrecked Ship and am now very confused about the scene that played afterwards.
A: This is a classic VIPRPG meme. Gomez is often seen violating the hero Alex at the end of VIPRPG shitpost games, and this is a nod to this long-standing tradition.
Q: I can’t find the “secret shop” the NPC talks about in the Dilapidated Settlement.
A: There is no secret shop, and it is most likely just a way to get you exploring the area to try and find other secret places. At best, it can be surmised that he is talking about the fact that a shop of such dubious nature does exist somewhere in the world, just not the playable world.
Q: A message popped up talking about how strong enemies have appeared across the land.
A: This signifies that you have liberated 33% or more of the Souls in the game world by defeating bosses. In addition to unlocking the Cavern of Giants, this message also heralds the appearance of the 4 Dragons (Lightning/Wind/Stone/Steel), Naked Golem, Dark Lord of Space, and Chaos Gomez (in the Waterfall Grotto if you have not befriended Aubergonath). This does NOT cause Trauma or HIKARI Ruinbringer to appear, however, whose conditions are simply defeating the YAMI Queen and HIKARI King, respectively.
Q: A boss that should have dropped a piece of equipment didn’t drop it at all.
A: You may carry up to 100 pieces of each equipment category (Weapons, Shields, Accessories). If you have 100 pieces in a specific category, you won’t receive those drops from bosses unless you discard/sell off unneeded equipment.
An attack or weapon used by an attacker of the same type has a greater multiplier applied to the attack’s overall effectiveness. E.g. Wind I swinging the Aero type Freeze Edge sword will be more effective than if Flame I were to use the same sword.
A strategy that relies on allowing party members to die, then awaiting their revival via the Revival EX Skill or a similar Equipment Skill (e.g. Undead Rapie’s King of Death) to unleash any attack(s) they can before dying again and repeating the process. This strategy hinges on keeping at least 1 party member alive at all times to hold the fort while the remaining party members die and come back. This strategy is typically paired with other EX Skills such as Revenge or Blood Water’s Revenger skill to capitalize on the low HP combatants have upon revival.
A difficulty modifier that can be applied to the game from the Bonus Room prior to beginning a new run. Its main points of interest are soft and hard SoulLV caps (Max SL: 200, SL cap starts at 80 and gradually rises as certain bosses are defeated), reduced enemy HP, increased enemy attack power, reduced Soul payouts from battles, and more.
Denotes skills that can have their effects toggled on and off from the party’s skill menu, or otherwise has an effect that can be reset to a typeless/baseline form (such as Burst I’s Sketch skill, which assumes the type of the first enemy it is used against).
Types
If you’ve ever played Pokemon, you already know what this is. ENCHANT FARM, however, has its own unique type chart that mostly aligns with the Pokemon type chart, with exceptions, exclusions, and name changes. Example: “Neutral” is, for all intents, the “Normal” type in Pokemon terms, while “Light” could be considered the “Psychic” type of ENCHANT FARM.
Typing is the single most important part of this game and factors into almost every battle interaction in some way, whether it be attacking or defending. All attacks have a type associated with them, and there is no such thing as a normal attack that has no type. All offensive actions are subject to possible multiplication, reduction, and even nullification based on the defender’s types. If ever you find yourself wondering why you are dealing so little damage, or why enemies are dealing so much damage, start by looking at the types of your party members, their equipment, and the enemies’ types.
The type chart can be viewed in-game from the Option menu.
Optimal Range
All weapons and skills have an optimal range in battle, denoted by Close, Mid, and Long. Close-range weapons and skills are stronger when used from the Front position in the formation, Mid-range from the two middle positions, and Long-range from the back position. Using weapons at the proper range can make a huge difference in damage output, which you can see for yourself firsthand by rotating a character around and checking the Effect% listed on the top bar while using the same weapon or skill. You are free to rotate the party’s formation during battle before committing to your actions.
The Frontliner(s)
This is the character who is “nearest the front” of the formation, excluding K.O.’d characters. Normally, this is whoever is in the literal front of the formation, but if the literal frontliner should fall, then the two middle positions become the effective “frontline” for the purpose of determining who the frontliner(s) is/are, and likewise with the member in the back position should all of their allies fall.
Physical Attributes
Slashing, Bashing, and Stabbing. Physical attacks are always associated with one of these three attributes. Shelled/carapaced foes resist Slashing, soft/gelatinous foes resist Bashing, and bony/skeletal foes resist Stabbing.
Innate Type
Each character has an innate type that they specialize in. This is displayed on the character sheets in the party editing menu, and is the type a character will use while not equipped with any shield. A weapon or skill of the same type as the character using it will gain 25% to its Effect%. This 25% may not sound like much, but can multiply into something much larger with other damage multipliers and bonuses as they stack up. It is absolutely vital that you keep your team’s innate types in mind while arming them with gear and skills for battle.
Type 1, Type 2 (First type, Second type)
A character may have up to 2 types at any given time. A character bearing a shield passively takes on the shield’s first type as their second type, while a character guarding takes on both of their shield’s types, temporarily replacing their innate type.
Example: Wind I’s innate type is Aero. While equipped with a Moon Barrier (Type 1: Fighting, Type 2: Light), her types become Aero/Fighting. If she defends, her types become Fighting/Light until the end of the round. You may witness this firsthand simply by telling a character to guard and watching their types change in real time.
DMG REDUCE%/Damage Reduction
This value indicates how much damage is reduced while being attacked. Shields come with innate physical and magical damage reduction values. Furthermore, each character has a Guard Skill which lists a DMG REDUCE percentage, which applies only while they are guarding.
Total damage reduction of a shield and a Guard Skill is multiplicative and not cumulative; a shield with 50% reduction used with a Guard Skill with 50% reduction reduces incoming damage by 75% and not 100%.
Status Ailments
These have a negative impact on combatants during battle. Unlike many JRPGs, ailments work against many, many bosses, and the ones they don’t work against are generally explicitly stated. Even if you don’t have anyone whose primary role is inflicting ailments, it is almost always worth trying them if you encounter a boss you just can’t seem to beat.
Status Ailments are resisted by certain types as well, and it may be worth assembling your party and gear around certain ailments when facing difficult bosses who like to use them.
SoulLV (SLv, SL, Soul Level)
This is the combined sum of your characters’ stat levels and an approximate measure of their overall combat strength. Total SoulLV factors in to how much damage a character deals and not just their STR/MAG stats, so it is generally worth leveling up all of a character’s stats, even ones that don’t benefit them much, to the level cap, although it is usually better to focus on their main stats first before worrying about the rest.
ELv (Enemy Level)
This is an approximation of enemies’ overall combat strength, and is visible in the menu in the map information tab on the bottom of the screen. Compared to your party members’ Soul Levels, Enemy Levels are ⅕ those values; a character of SLv150 is roughly as strong as enemies at ELv30.
Soul Multiplier
This is a bonus to the amount of Souls gained after defeating foes in battle. Each battle you win adds 1% to the multiplier, up to a maximum of 150%. Healing your party at fairy fountains will reset the multiplier to 100%, but filling Crystal Bottles with water and manually healing each party member will not reset it. Also, defeating bosses automatically sets the Soul Multiplier to 150%, so don’t feel like you have to go out of your way to defeat lots of weaker foes before challenging a boss.